Drum roll please….it is time for the Annual….DEVILED….EGGS…blog!!!!! (I guess I gave it away in the title.) Hooray!!!!!!!! I think this has become one of my favorite blogs on Felt Like a Foodie. I know that if I didn’t feel the pressure to write about deviled eggs every year…I probably wouldn’t force myself to experiment with the fillings. (Oh who am I fooling…I’m so wild…I would probably do this anyway!)
I was perusing the Internet getting some inspiration and I noticed something I never had seen done to a deviled egg before. (Please note…do not look at a website called Deviled Egg Fetishes….if you wondered which came first….it wasn’t the chicken…)
Anyhow, I saw that some people actually make their devilled egg with a pickled egg!!! (Are you rereading my last paragraph? Yep…it made me do a double take too.)
I digress….a majority of the recipes I saw were using a prepickled egg that was purchased in a store. I’m sure you’ve seen them in a jar on a shelf with a lot dust on them because a lot of people don’t ever touch those bottles or shelves….and if you do…I sort of want to know….and I sort of don’t want to know.
I decided to goof around with a couple recipes on my own.
I started small and heated 1 cup of white vinegar with 2 teaspoons each of kosher salt and sugar. Once the salt and sugar dissolved, I removed it from the heat and let it cool to room temperature. After it cooled down, I separated it in half into two bowls. In one half I added a teaspoon of turmeric (so the eggs would turn yellow) and in the other half I added a quarter of a red onion (so the eggs would turn pink).
Since I was I didn’t want to waste a bunch of eggs I only did two eggs. I added one peeled, hard cooked egg to each bowl and placed it in the fridge for a few hours. When I removed the eggs, to my joy and surprise…..my turmeric egg was yellow!!! SCORE!!!! My “pink” egg was not too pink but it did have a nice light hue. (Plus the added bonus of some pickled onions for a garnish.)
I think if the eggs sat in the solution longer the colors would have been deeper. Texturally, it was mildly different than a “normal” hard-boiled egg. (But given what I saw on the WEB….I’m not sure if I even know what normal is anymore.)
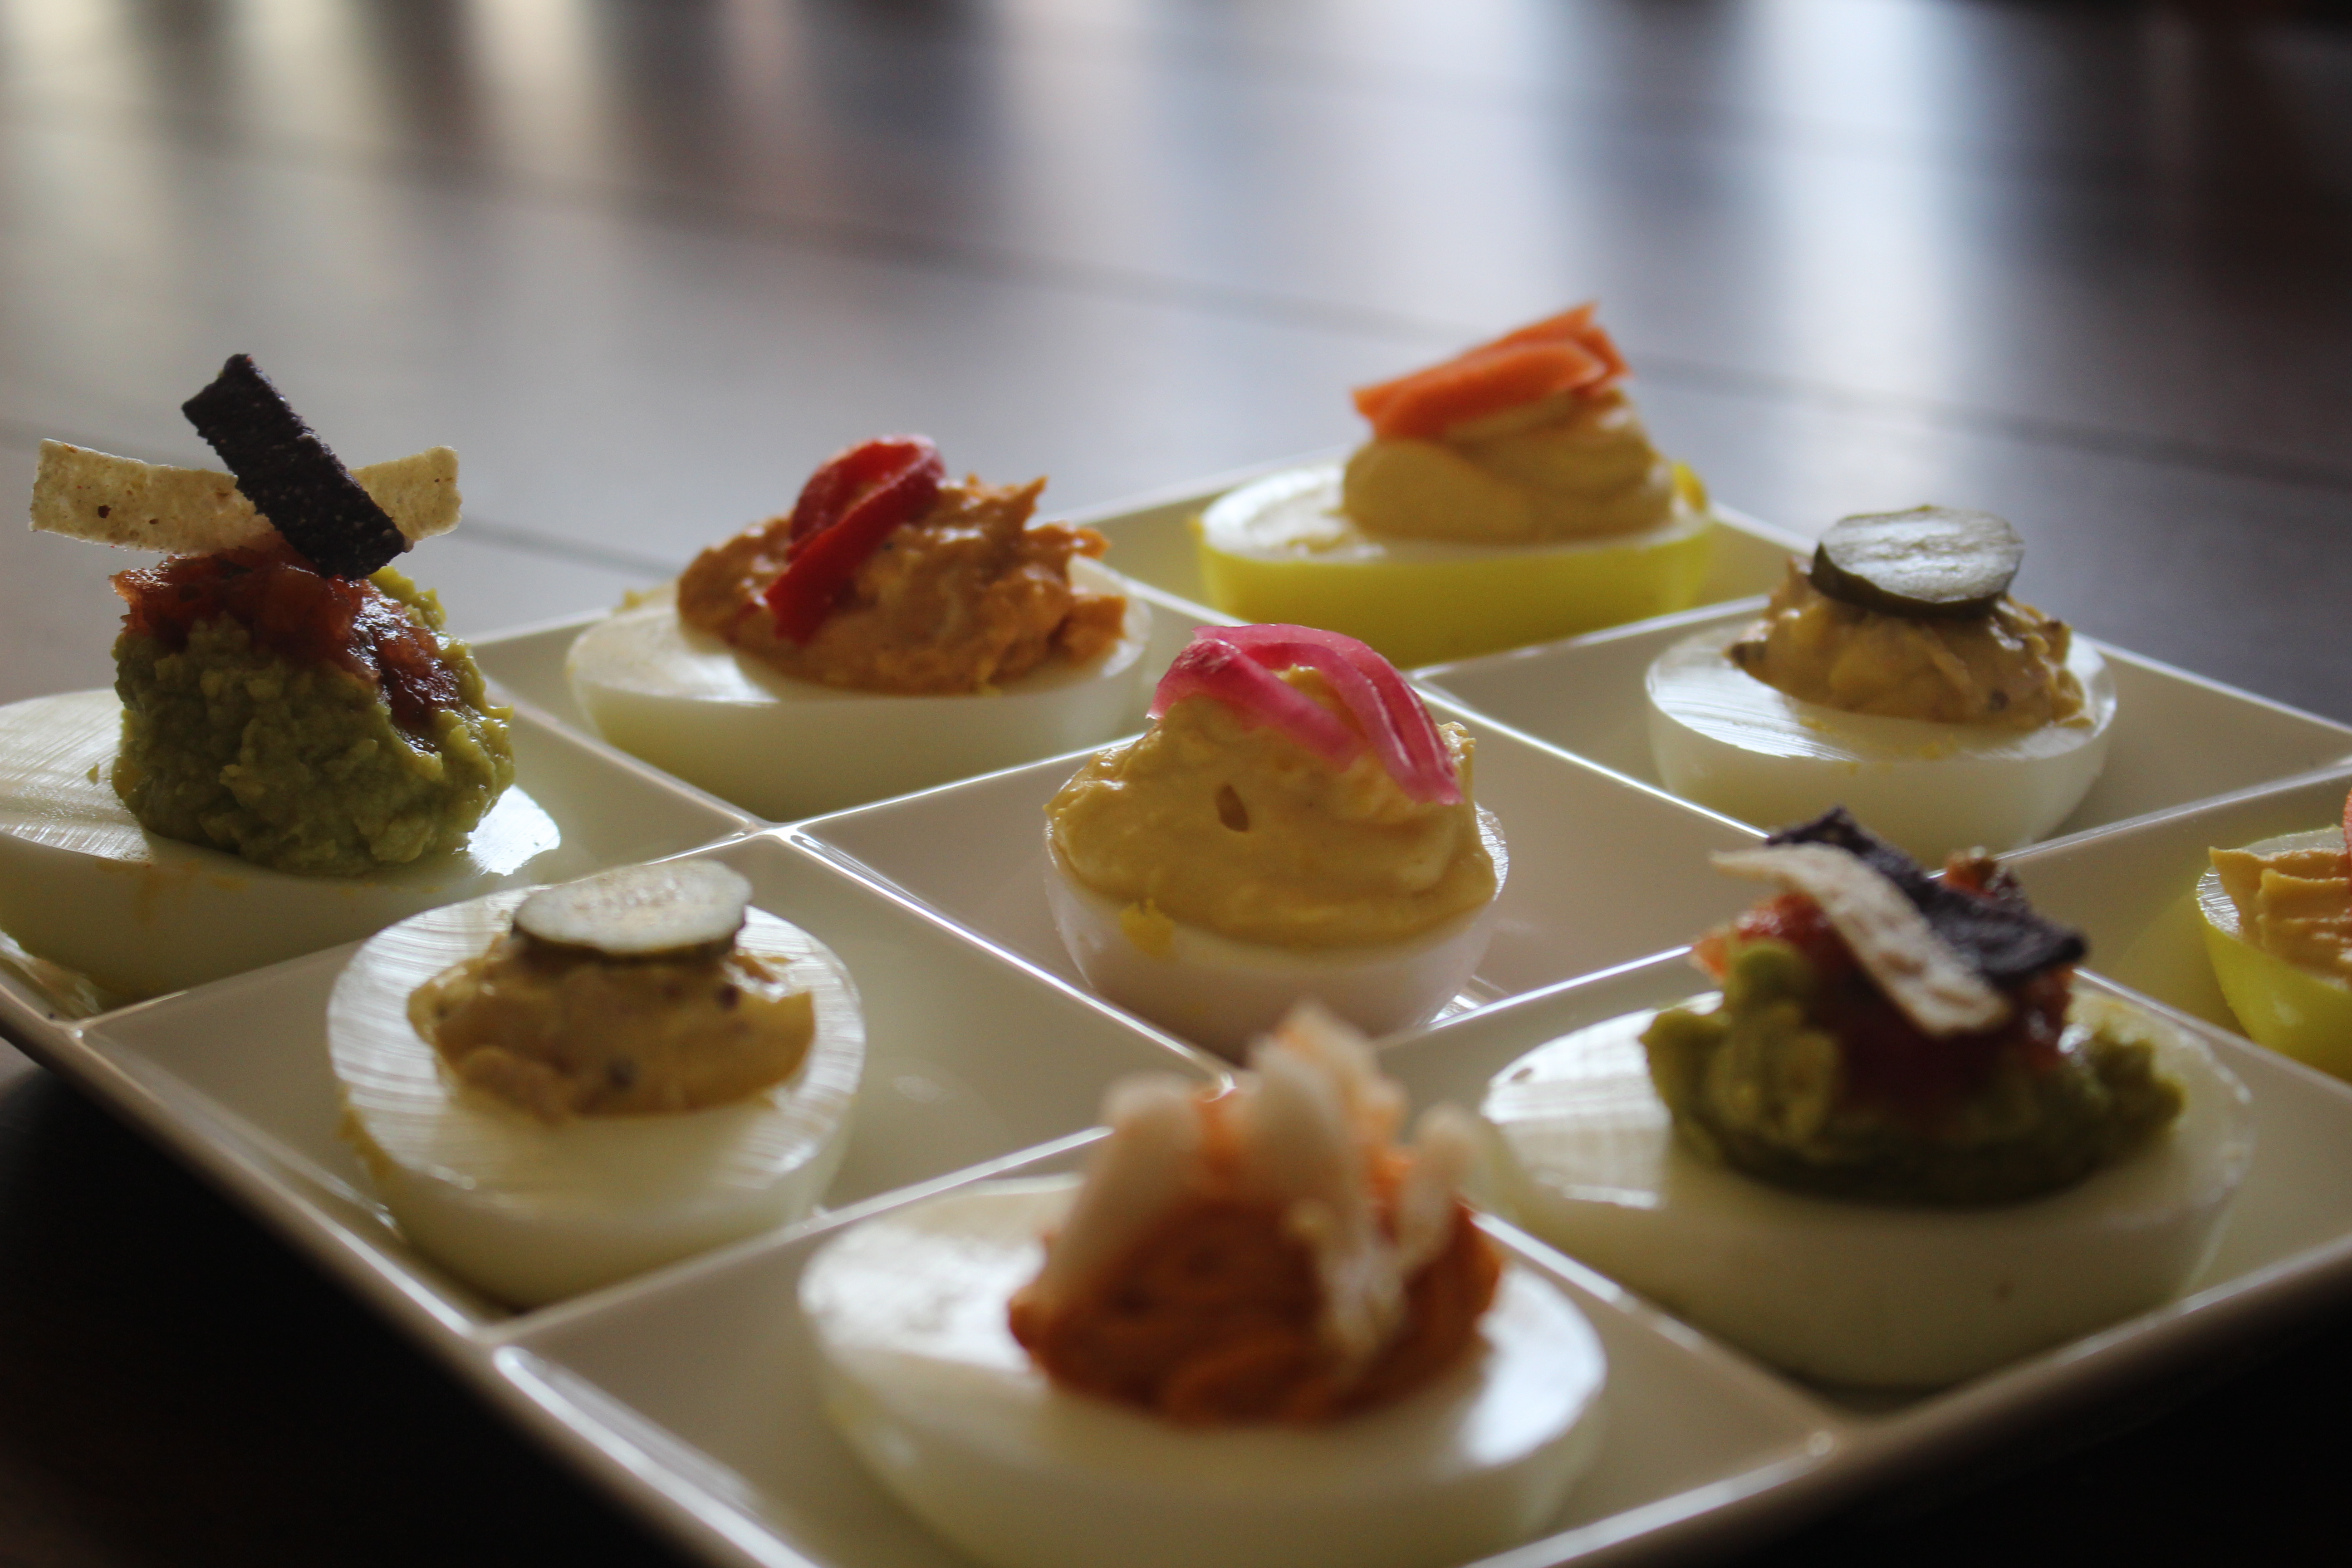
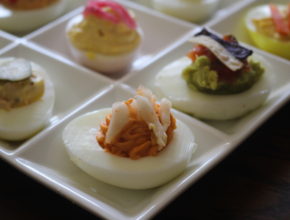
The pickling color did make for a prettier egg plate but I’m not sure I’d want a full dozen pickled. A plate with a mix of textures and flavors is a lot more fun….so the following is what I created.
Each “recipe” is for 1 hard-boiled egg. Obviously, you aren’t going to make one egg in each flavor (because it is nuts and creates a big mess) but it should help you gauge how much of each ingredient to add to each yolk. Does that make sense???
Simply…I am giving you the filling options and you mix the filling, pipe it into the egg white (if you are fancy) and garnish. Ta-dah
Korean (non pickled egg)
1 egg yolk
1 tsp of Gochujang
1 Tbsp Mayo (If you have some Kewpie mayo, that would be awesome)
Garnish…a couple pieces of kimchi
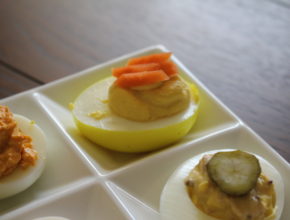
The Turmeric (turmeric pickled egg)
1 yolk
1 Tbsp Mayo
½ tsp Dijon
Garnish….pickled carrots
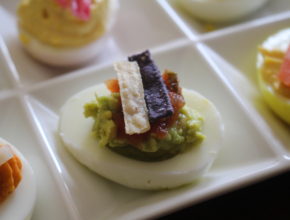
The Guacamole (non pickled egg)
1 yolk
2 Tbsp fresh guacamole
Garnish….splash of salsa and tortilla strips
The Pickled Red Onion (I will state the obvious and say use the pickled red onion egg)****Hubby’s Favorite******
1 yolk
1 Tbsp Mayo
1 tsp dijon
Garnish…pickled red onion pieces
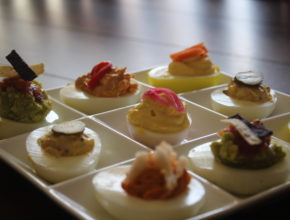
The Ham Salad ****My Favorite****
1 yolk
1 piece of ham (lunchmeat ham is perfect), chopped
¼ tsp stone ground mustard
1 tsp juice from pickle jar
1 Tbsp Mayo
Garnish….pickle slice

Hummus
1 yolk
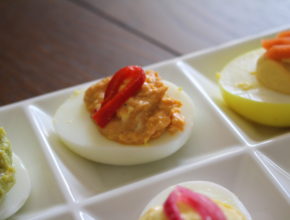
2 Tbsp red pepper hummus (You may have to add more…it was very thick)
Garnish…a sliver of roasted red pepper
I simplified my method a lot this year. Just remember to give it a taste before filling your egg white. I didn’t need to add extra salt because either the pickling or the garnishes added enough.
The key is to have fun with your devilled eggs…….but not too much fun!