Cutlets. Do you love or hate them? Does the sight of them make you smile? Do you dream of one day getting your hands on one? Have you never heard of them?
Chicken cutlets are chicken breasts that are halved at their thickest part and then pounded so each piece is an even thickness. They are usually coated and then fried or baked. The simplicity of cutlets is that they cook quickly and pair up with many different sauces and toppings.
Here is a hint….if you plan on googling this topic later…make sure you put in the word “CHICKEN” before cutlet. Apparently, there are cutlets that women stuff in their unmentionables to make them look…how do I put this gently…it makes them look like someone is squeezing them from the middle and the excess is popping out the top of their shirt. Unfortunately, I think they make a lot of women look like a broken can of biscuits.
I digress….I always thought a chicken cutlet was an “Italian” thing but then realized places like Germany (schnitzel), Japan (Katsu), France (escalope) and Spain (Milanesa) all have dishes that are based around a cutlet.
Think of it as the foundation of so many meals we love to eat. A cutlet that is executed perfectly usually results in a meal that stays in our mind forever….on the other hand…a poorly executed cutlet may keep us from wanting one ever again.
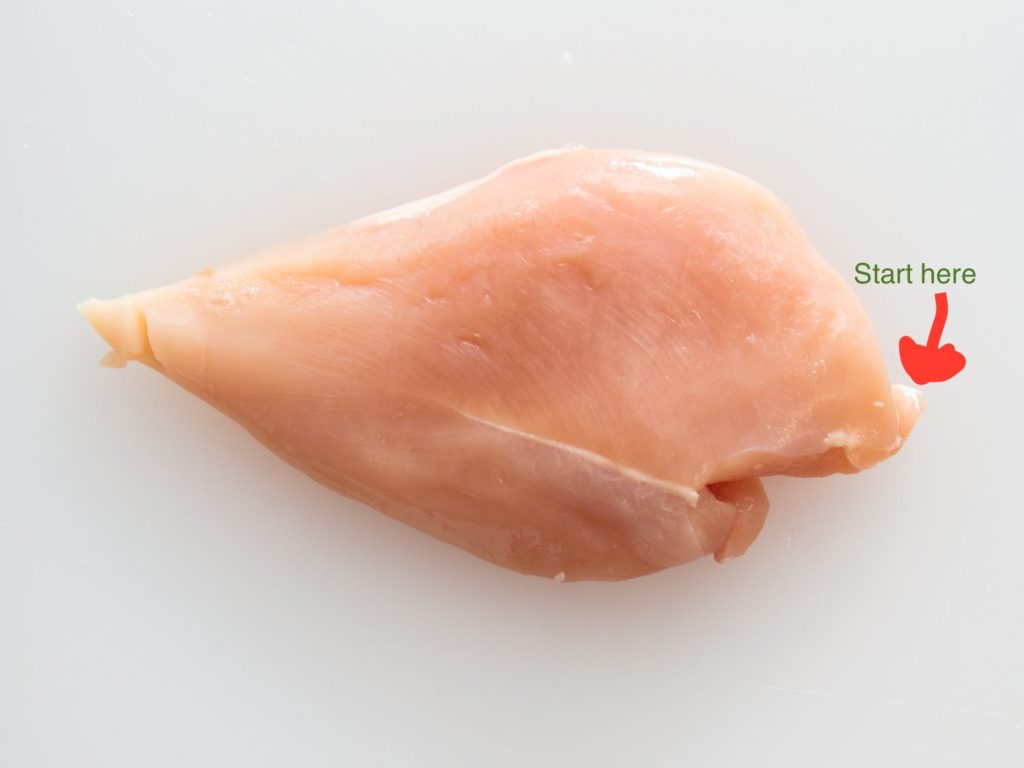
Let’s start by talking about how to do this. Take your chicken breast and lay it in front of you on cutting board horizontally. On one side (we’ll say your right side for the sake of this discussion), you have the fatter end of the breast and then it weans down to the tip.
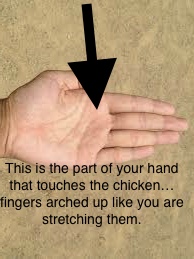
Use your hand to hold the breast steady and apply pressure to keep it steady. (See diagram below of a random hand on found online….I don’t post my palm so that a palm reader doesn’t take it upon themselves to tell me my lifeline.)
Have your knife horizontal with the blade facing your chicken breast and gently slice toward the smaller end of chicken breast. Odds are that you have even slices before you get to the end. Keep those fingers up in case your knife slips. If your chicken breast isn’t perfectly “even,” it is okay our next step will work it out. (And any tension.)
Place on piece of your chicken breast between two pieces of parchment or plastic wrap. There is a company that makes these baggies called “perfect portions.” I like to put the chicken in one of those because they are pretty sturdy. Using your tenderizing mallet (the flat side)…pound away. Start from the middle and pound outward. ¼- ½ inch thickness is usually the desired goal. If you don’t have a mallet, I’ve used a flat bottom can. (If you are in a marching band, a bass drum mallet may work well too.)
Do this for all the chicken you want. Don’t worry if there are some straggly pieces on the edges. You can cut them if you want but honestly no one notice once they are cooked.
The next decision you have is how to coat these beauties. Most restaurants fry their cutlets because it is easy to coat them and then dip them down. My goal when I started making these last weeks was to come up with a coating so I could bake them and still retain some crunchiness.
Before your start, preheat the oven to 400 degrees. Take a baking sheet and place an oven safe wire rack on top. Your goal is to allow the chicken to have some air moving about below it and not be flat on the pan. I would spray the cooling rack with nonstick spray too if it isn’t coated.
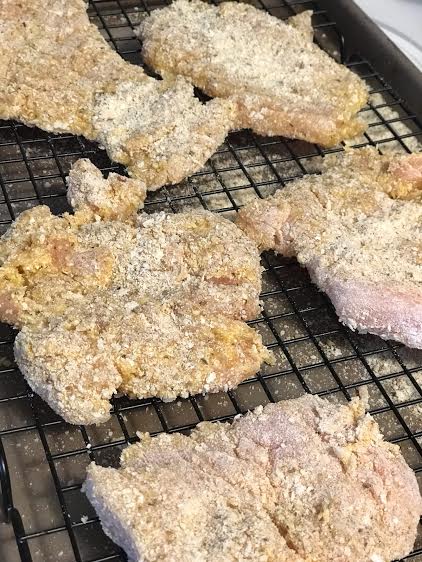
Set up a “breading station” as follows. First bowl, a beaten egg. Next bowl, flour. Finally, your final bowl will have 1/3 of a cup of bread crumbs (the kind you buy in a container that are fine), 1/3 cup of parmesan cheese (yes, the green bottle will work) and finally some panko (Japanese bread crumbs).
Dip each cutlet in the egg (shake off the excess), dip in the flour (shake off the excess) and then coat with the breadcrumb mixture. I press the coating on each piece to insure it doesn’t flake off. Place on rack. Repeat.
Bake for about 20 minutes flipping halfway through cooking. As always, check to make sure the chicken is cooked.
I don’t add too much to the cutlet cooking since usually when I make them, I’m not sure if I am going to freeze some for later or what recipe I might use. If you are making a specific recipe like chicken picatta, you could grate some lemon zest. If you are making a French dish, some herbs de Provence might taste great. I go easy adding salt and pepper because you can always add seasoning later….you can’t take it out.
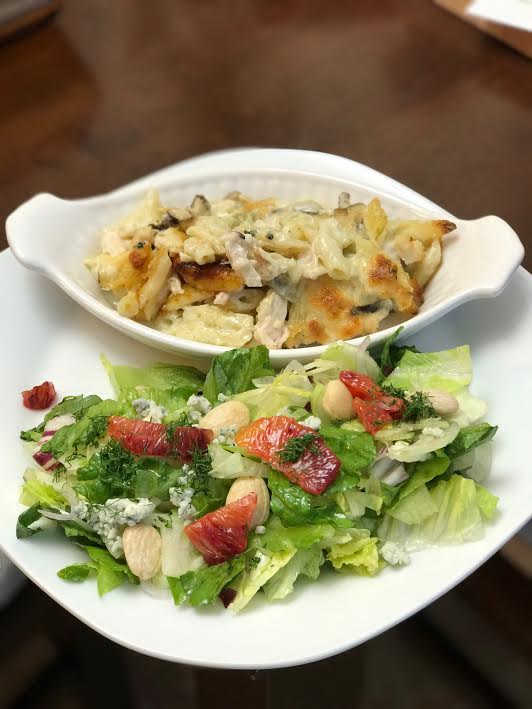
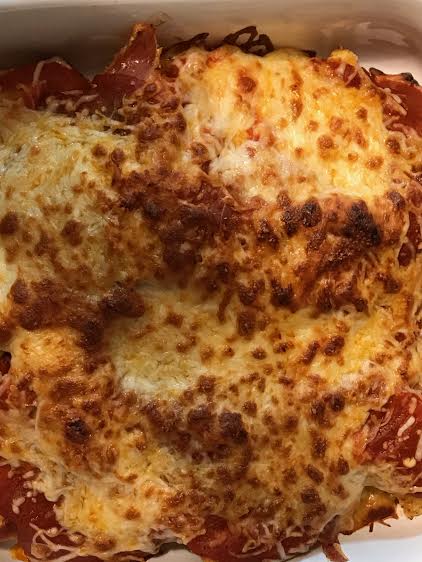
My favorite cutlet recipe is a simple chicken parmigiana. Make the cutlets as directed above. When they are done cooking, place them in a baking dish. Generously add your favorite heated pasta sauce over the top. (Chicken parm is great recipe if you have some extra sauce in the house.) Top with shredded Italian cheese and broil on low a until cheese is melted. You’ve already cooked your chicken so there shouldn’t be a worry about it being underdone.
If you have frozen your cutlets, you can place the frozen cutlets in your dish and bake. I go low and slow in this case because I don’t want to dry out the meat. 325 for about 20-25 minutes usually works. It may not be as crispy but it will still taste great.
I still like a good ol’ pan fried cutlet but it is nice to have some options. This was a lot less messy so that makes me happy.
If you aren’t making them, this would be a great goal this year. (And if you make them the right way….you won’t need those other cutlets in your shirt, Ladies!)